PROXIMANOVA-LIGHT.OTF PROXIMANOVA-LIGHTIT.OTF PROXIMANOVA-EXTRABLD.OTF PROXIMANOVA-BOLD.OTFPROXIMANOVA-BLACK.OTF
Get this font in here!
This Article Applies to:
- AVG AntiVirus Business Edition
- AVG Internet Security Business Edition
- AVG File Server Business Edition
- AVG Email Server Business Edition
AVG Business Antivirus provide
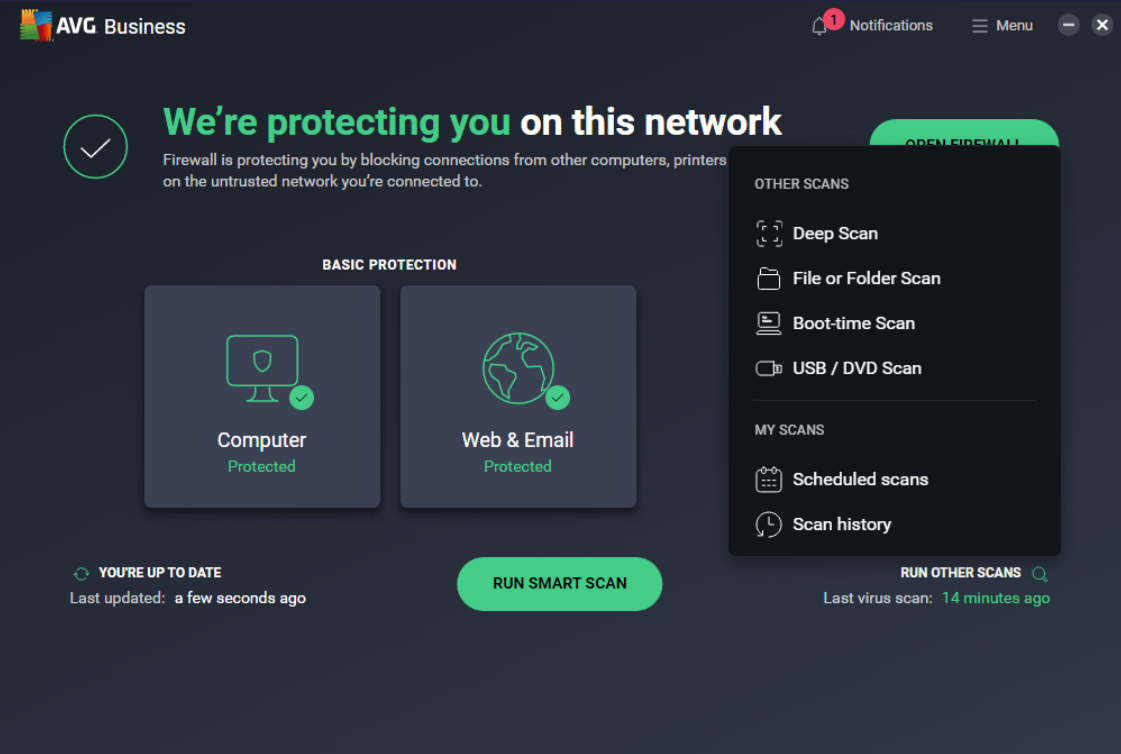
- Smart Scan — A comprehensive scan that detects malware, out-of-date software, browser add-ons with poor reputations, network threats, and performance issues.
- Deep Scan — An in-depth scan of your system that checks all hard drives, rootkits, and auto-start programs.
- File or Folder Scan — Scans only the folders you select when you initiate the scan.
- Explorer Scan — Scans specific files or folders directly from your desktop (only available via the Windows context menu).
- Boot-Time Scan — Used for performing a scan during system startup before any malware is launched, improving the chances of detecting and removing malware before it can do any harm.
-
- USB/DVD Scan — Scans all removable media that is currently attached to the PC, such as USB flash drives and external hard drives.
Running Scans
Smart, Deep , File or Folder , Boot-Time, USB/DVD, and Custom Scans
Apart from the Explorer Scan, which can only be accessed via the Windows context menu (see Explorer Scan below), you can run each of the above-mentioned scans
- Smart Scan: Click the Run Smart Scan button.
- Deep Scan: Click Run Other Scans > Deep Scan.
-
- Boot-Time Scan: Click Run Other Scans > Boot-Time Scan, then Run on Next PC Reboot.
- For a more thorough scan, you can install specialized definitions first using the provided link.
- In the event malware prevents AVG from running Boot-Time Scan , try
- USB/DVD Scan: Click Run Other Scans > USB / DVD Scan
-
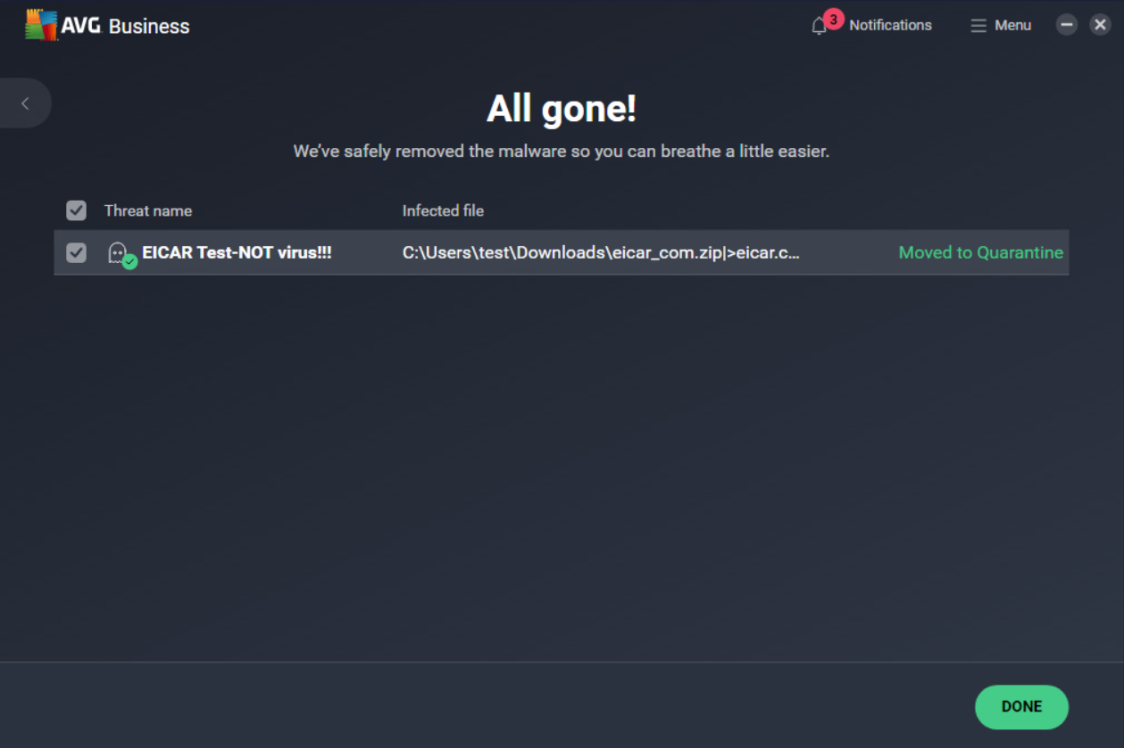
Once the scan completes and processes the results, all found issues (if any) will be displayed in the client UI, and you can resolve them directly on the results screen.
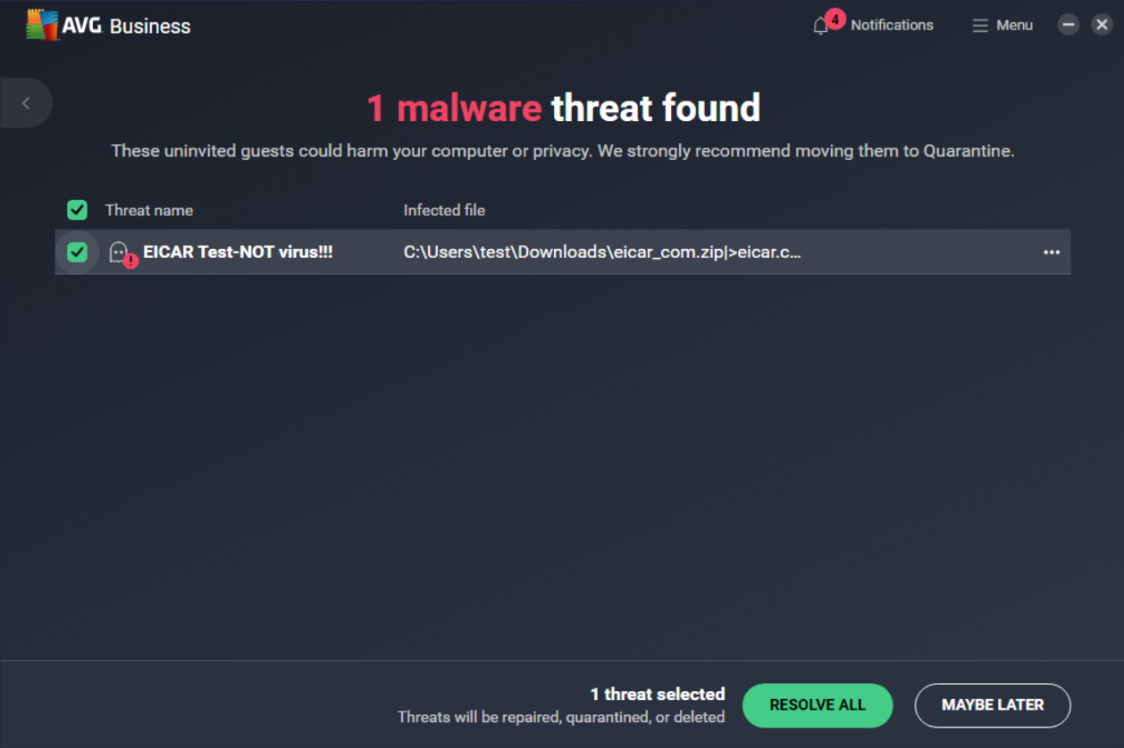
Via the actions menu (three dots), you can directly add a detected item to exceptions if needed (e.g. in case of a false positive). To learn more about exceptions, see

You can also configure each scan to resolve issues automatically upon detection (see
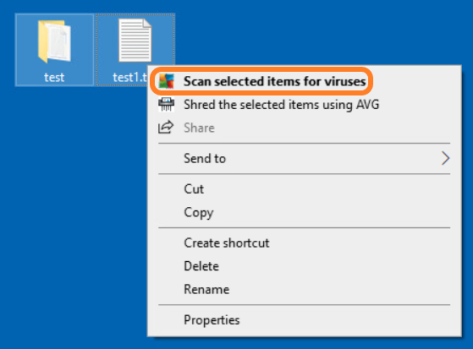
Explorer Scan
You can perform this scan directly from your Desktop or File Explorer by right-clicking the item(s) you want to scan, then selecting Scan selected items for viruses from the Windows context menu.
If no issues were detected during the scan, you will be notified via a pop-up dialog.
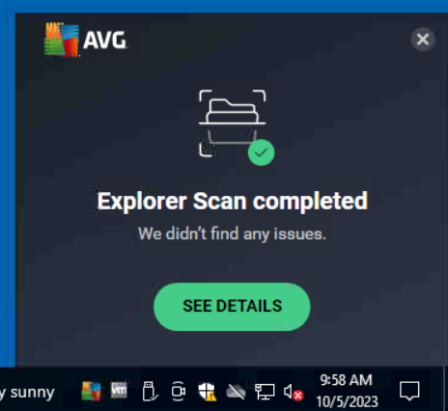
If any issues were found, the previously mentioned scan results screen of the client UI will automatically open.
Special Cases
For incomplete scans, an error message indicating the reason the scan was unable to complete is visible on the scanning screen. Although there are many different reasons a scan may be unable to complete, some of the most common reasons are:
- Archive is password protected indicates that the file is password protected. Some programs use password protected archives to store their data even if you did not set the password. Depending on your scan settings, only the "wrapper" file is scanned while the archive content is not.
- Archive is corrupted indicates that the file may be corrupt because it was only partially downloaded or saved to your hard disk, or that it is a special type of archive.
- The process cannot access the file because of another process indicates that another process or program was accessing the file during the scan.
- The file is a decompression bomb indicates that the file was too large to be decompressed for malware analysis. Decompression of large files generates vast amounts of data which can cause your system to be unstable or cause it to crash.
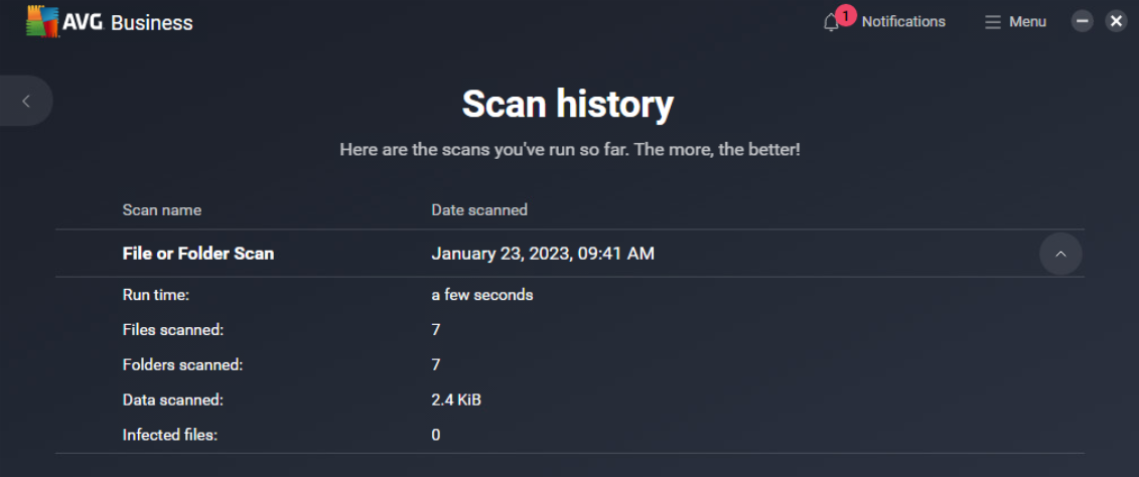
Viewing Scan History
To see which scans have been performed on the device and when,
Expanding an entry will show further information:
- Run time
-
-
-
- Infected files
In case a scan was stopped before completing, a warning icon will be displayed, and the tooltip will provide more information.
