PROXIMANOVA-LIGHT.OTF PROXIMANOVA-LIGHTIT.OTF PROXIMANOVA-EXTRABLD.OTF PROXIMANOVA-BOLD.OTFPROXIMANOVA-BLACK.OTF
Get this font in here!
This Article Applies to:
- AVG AntiVirus Business Edition
- AVG Internet Security Business Edition
- AVG File Server Business Edition
- AVG Email Server Business Edition
Via the AVG Business client settings, you can customize the following types of scans:
- Smart Scan — A comprehensive scan that check for issues such as hidden threats and security vulnerabilities.
- Deep Scan — An in-depth scan of your system that checks all hard drives, rootkits, and auto-start programs.
- File or Folder Scan — Scans only the folders you select when you initiate the scan.
- Explorer Scan — Scans specific files or folders directly from your desktop (only available via the Windows context menu).
- Boot-Time Scan — Used for performing a scan during system startup before any malware is launched, improving the chances of detecting and removing malware before it can do any harm.
If you need to configure a
Configuring Smart Scans
In the Menu > Settings >
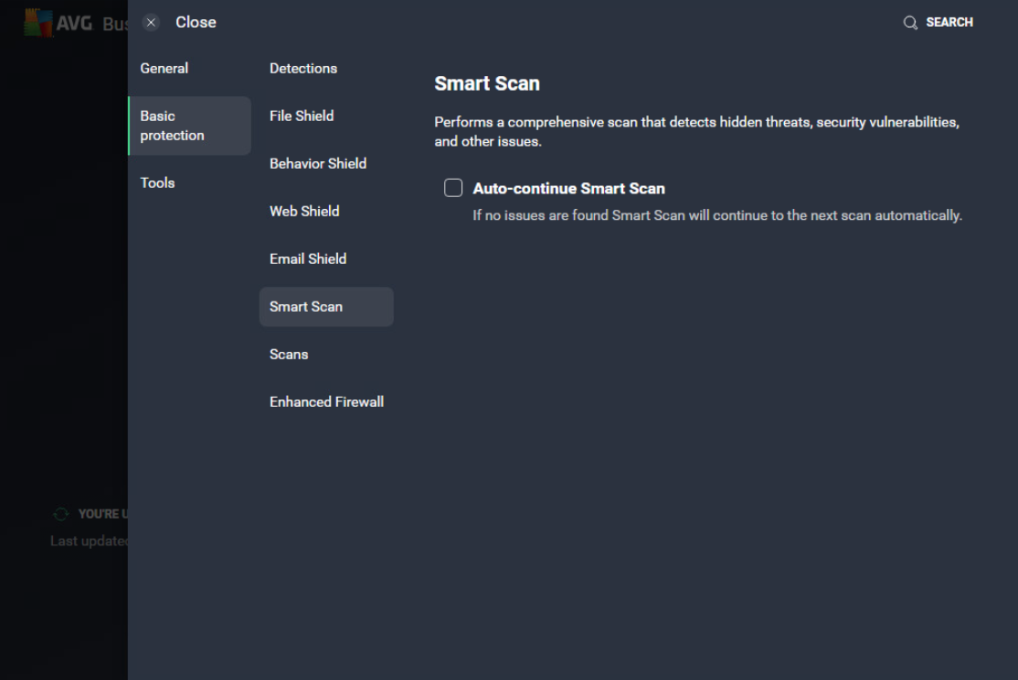
Smart Scan does not have any other configurable options in advanced settings, but some Geek Area settings apply to this scan type as well.
Configuring Deep , File or Folder , and Explorer Scans
The settings for
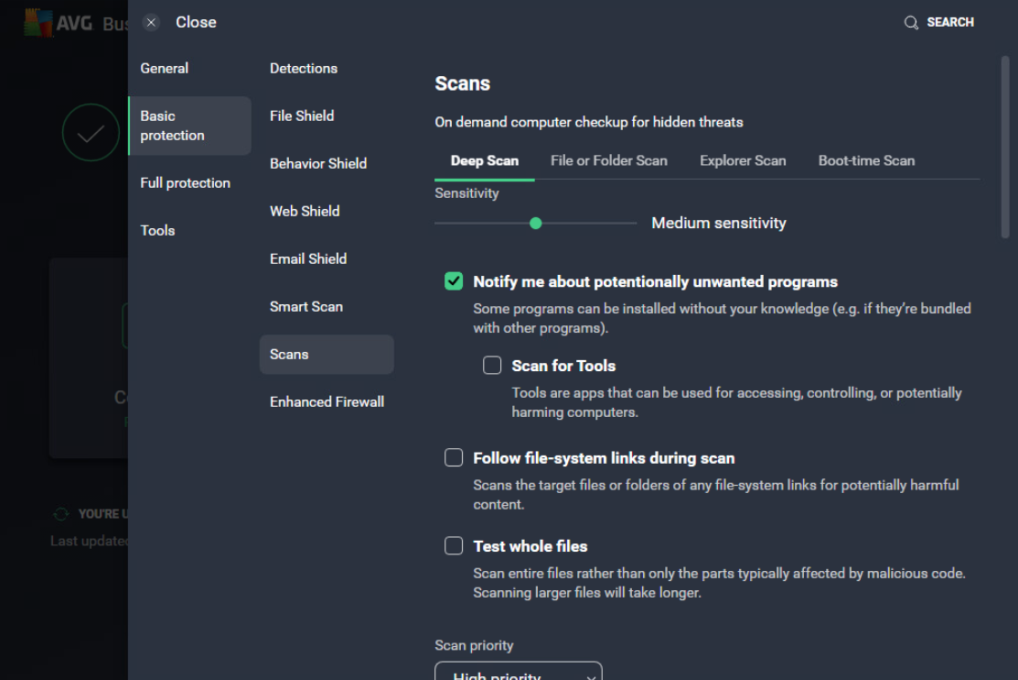
Here, you can configure the following options:
- Sensitivity: You can determine the sensitivity of the scan by adjusting the scan sensitivity settings. The higher the sensitivity, the higher the protection (but also the potential for false positive malware detections). Reducing the sensitivity reduces the chance of false positive detections, but may also reduce the effectiveness of the scans. Scan sensitivity can be adjusted to high, medium, or low by dragging the slider.

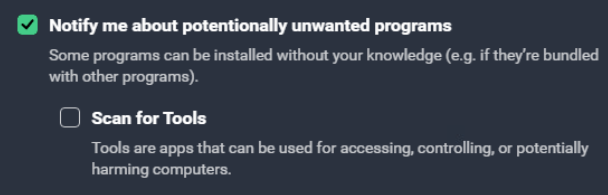
- Notify me about potentially unwanted programs (PUPs): Enables AVG to scan for programs that are stealthily downloaded with other programs and can perform unwanted activity.
- Scan for Tools: An additional option to scan apps that can be used for accessing, controlling, or potentially harming computers.
- Follow file-system links during scan: Enables AVG to scan other files used by the files being scanned for potentially harmful content.

- Test whole files: Enables AVG to scan entire files rather than only the parts typically affected by malicious code (the process will take longer for larger files).

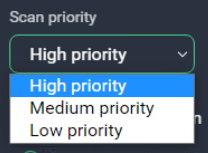
- Scan priority: Determines how many resources can be utilized by AVG during the scan (higher priority means a faster scan, but may slow down other processes on the device). Via the drop-down menu, you can choose between high, medium, and low priority.
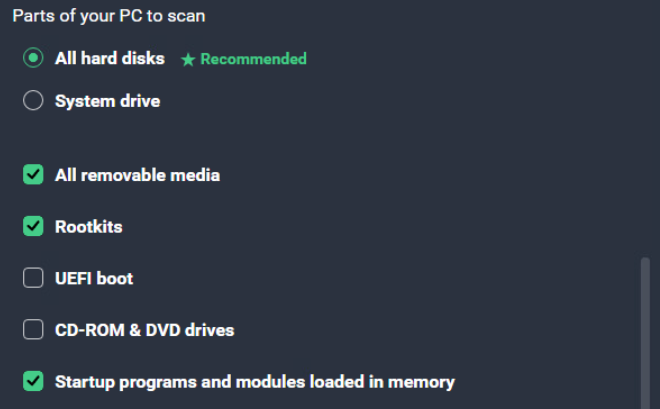
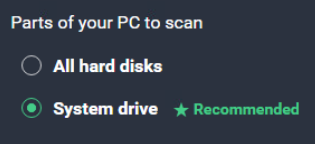
- Parts of your PC to scan (for
- All hard disks/System drive (only one can be selected): Choose whether AVG scans all hard drives (recommended) or only the system drive.
- All removable media: Allows AVG to scan applications that launch automatically when you insert a USB or other removable device into your PC.
- Rootkits: Allows AVG to scan for hidden threats in the system.
- UEFI
- CD-ROM & DVD drives: Allows AVG to scan CD and DVD drives for malicious content.
- Startup programs and modules loaded in memory: Allows AVG to scan applications and processes that launch upon system startup or run in the background.
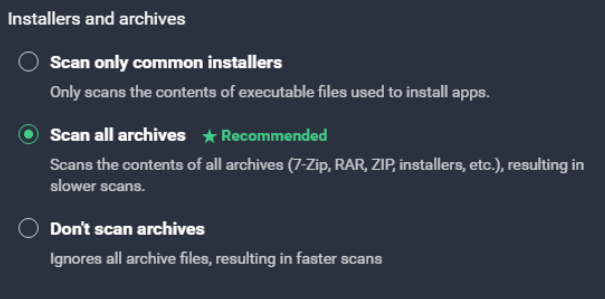
- Installers and archives: Specify the compressed file types that you want AVG to unpack during the scan:
- Scan only common installers (recommended for
.zip,.rar, and other executable or installer files. - Scan all archives (recommended for
- Don't scan archives: Prevents AVG from scanning archive files, which provides a faster scan.
- Scan only common installers (recommended for
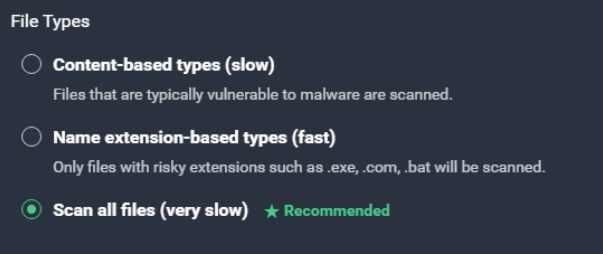
- File Types: Specify file types that are scanned:
- Content-based types (recommended for
- Name extension-based types: Scans files with risky extensions only (such as
.exe,.com,.bat). This is the fastest scan configuration. - Scan all files (recommended for
- Content-based types (recommended for
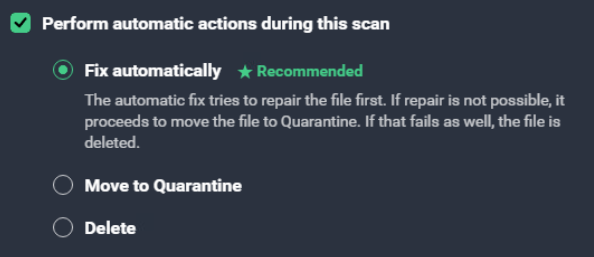
- Perform automatic actions during this scan: This section allows enabling and configuring automatic responses to any threats detected by the scan:
- Fix automatically (recommended): Enables AVG to repair the infected file. If repair is not possible, the file is quarantined and, if that fails, the file is deleted.
- Move to Quarantine: The infected file will not be repaired automatically, but will be quarantined.
- Delete: AVG will not try to repair the infected file or quarantine it; instead, the file will be immediately deleted.
- Shut down computer after scan finishes: Enables AVG to shut down the computer immediately after the scan completes.

- Generate report file: Enables AVG to create a report file automatically and store it in
C:\ProgramData\AVG\Antivirus\report. This file is sometimes requested by AVG support for troubleshooting purposes.

Configuring Boot-Time Scans
The following settings can be configured for Boot-Time Scans:
- Sensitivity: You can determine the sensitivity of the scan by adjusting the scan sensitivity settings. The higher the sensitivity, the higher the protection (but also the potential for false positive malware detections). Reducing the sensitivity reduces the chance of false positive detections, but may also reduce the effectiveness of the scans. Scan sensitivity can be adjusted to high, medium, or low by dragging the slider.
- Notify me about potentially unwanted programs (PUPs): Enables AVG to scan for programs that are stealthily downloaded with other programs and can perform unwanted activity.
- Scan for Tools: An additional option to scan apps that can be used for accessing, controlling, or potentially harming computers.
- Unpack archive files: Enables AVG to extract files and folders from archives for scanning.

- Parts of your PC to scan: Choose whether AVG scans all hard disks or only the system drive (recommended).
- Auto start programs: Allows AVG to scan programs that automatically start when you turn on the computer.

- Perform automatic actions during this scan: This section allows you to enable and configure automatic responses to any threats detected by the scan:
- Fix automatically (recommended): Enables AVG to repair the infected file. If repair is not possible, the file is quarantined and, if that fails, the file is deleted.
- Move to Quarantine: The infected file will not be repaired automatically, but will be quarantined.
- Delete: AVG will not try to repair the infected file or quarantine it; instead, the file will be immediately deleted.
Additional Geek Area Settings
Within the Geek Area, there are several further settings for virus scans. To access these:
- Go to Menu, then select Settings
- Click Search in the top right corner
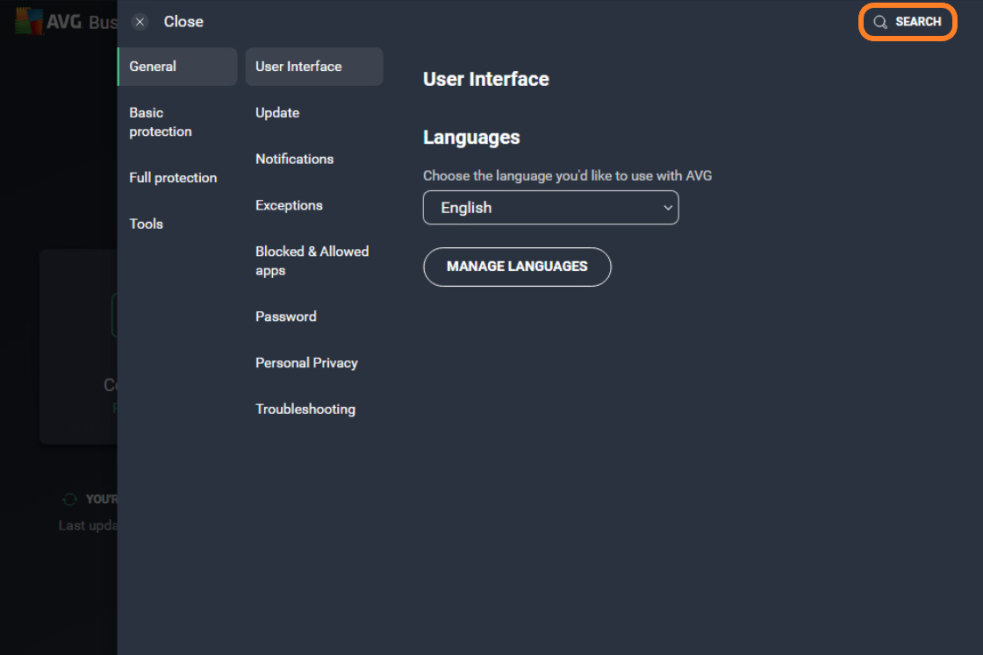
- Type geek:area in the search field, then hit Enter
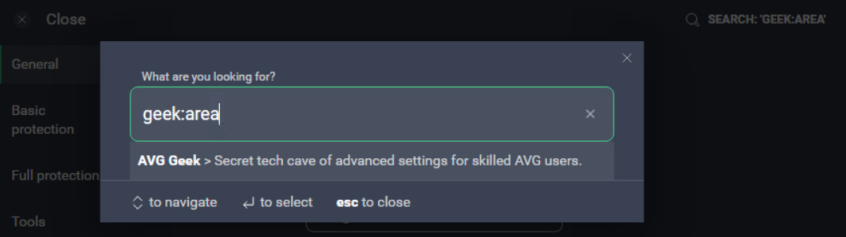
- Scroll down to the Scans section
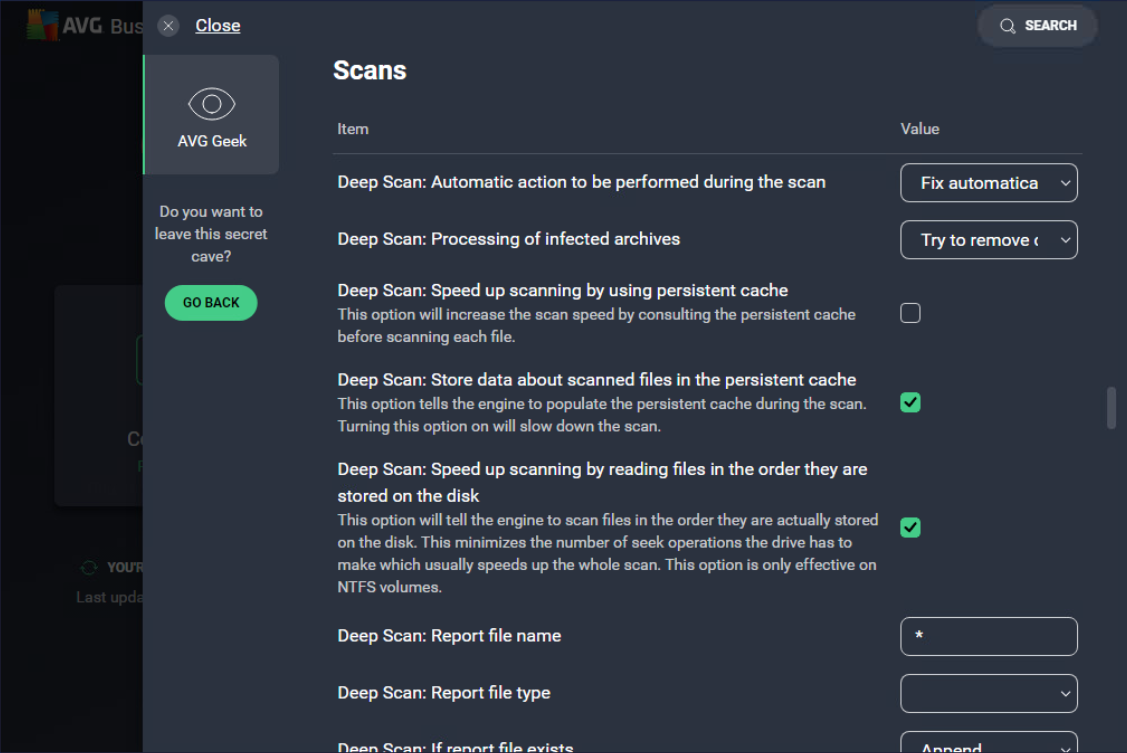
The following options are available here for the various scans:
- Automatic action to be performed during the scan: Choose the automatic response to threats detected by the scan:
- Fix automatically: Runs a sequence of actions (repair file; if not possible, then move to Quarantine; if not possible, then delete).
- Move to Quarantine: Sends the threat to Quarantine, where it cannot harm your system.
- Repair: Removes only malicious code attached to an otherwise safe file — this is not possible for files that are entirely malware.
- Abort connection: Terminates the connection as soon as a potential threat is detected.
- Ask: AVG asks what you want to do with a detected threat before any action is taken.
- Delete: Permanently removes the file from your computer.
- Nothing: No action is taken; the threat is listed in your scan results and you can decide what to do later.
- Processing of infested archives: Choose what should be done when threat is found in a file contained in an archive:
- Try to remove only the packed file from the archive; if it fails, do nothing
- Try to remove only the packed file; if it fails, remove the whole containing archive
- Always remove the whole archive
- Speed up scanning by using persistent cache: Choose whether to consult the persistent cache before scanning each file.
- Store data about scanned files in the persistent cache: Choose whether to populate the persistent cache during the scan. Enabling this option slows the scan.
- Speed up scanning by reading files in the order they are stored on disk: Scan in the order files are actually stored on the disk rather than by file path. Only effective on NTFS volumes.
- Report file name: Enter a name for the report file (default * will use the default file name).
- The Generate report file option in standard settings still needs to be enabled for a report file to be created.
- Report file type: Select the format of the report file:
- Plain text (ANSI)
- Plain text (Unicode)
- XML
- If report file exists: Select Append if you want new results to be added to the end of the previous report, or Overwrite if you want new results to replace the previous report.
- Using the Append option will gradually increase the size of the report file on the disk. Including informative events such as OK will also greatly increase the size on the disk as every clean file will be reported.
- Reported items: Define which events appear in report files. Type any of the following events into the text box provided, ensuring entries are separated by semicolons:
- Infected — Files and areas of the scanned environment that the virus scan identifies as containing malware
- HardErrors — Unexpected errors that require further investigation
- SoftErrors — Minor errors, such as a file being unable to be scanned because it was in use
- OK — Files and areas that the virus scan identified as being clean
- Skipped — Files and areas that the virus scan did not check because of the scan settings
- Enable raw disk access during AVG Boot-Time Scan: This option needs to be enabled for Boot-Time Scan to be able to detect certain rootkits.
- Skip checking of digital signatures of infected files: The information from digital signatures can be used to prevent false alarms, but checking them does slightly slow down the scans.
- Clean scan history: click the Perform button to remove the scan history.
Configuring Exceptions
Although it is not recommended to exclude any files or folders from a scan, you can define certain exceptions to temporarily exclude particular files or folders from a scan for troubleshooting purposes. For detailed instructions, see
Other Articles In This Section:
Creating and Configuring Scheduled Scans
Command-Line Updates and Scans
Related Articles: