PROXIMANOVA-LIGHT.OTF PROXIMANOVA-LIGHTIT.OTF PROXIMANOVA-EXTRABLD.OTF PROXIMANOVA-BOLD.OTFPROXIMANOVA-BLACK.OTF
Get this font in here!
This Article Applies to:
- AVG Business Cloud Console
Mail Shield checks incoming and outgoing email messages in real time for viruses and links to malicious websites. This only applies to messages handled by mail management software installed on your computer, such as Microsoft Outlook. If accessing a web-based email account via an internet browser, the device is protected by other Antivirus shields.
We do not recommend installing this component on a server OS that is also running Microsoft Exchange. The Exchange and Anti-Spam components handle the Exchange-level filtering and will conflict with
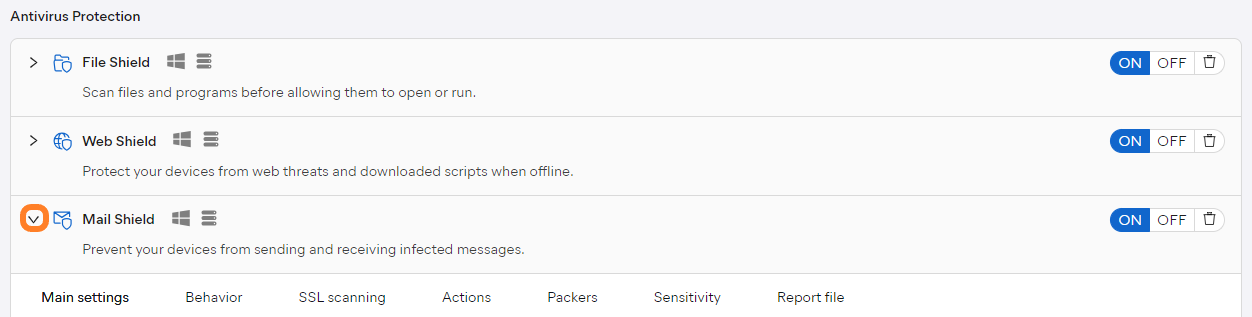
Configuring Mail Shield Settings
To access Mail Shield settings:
- Open the Policies page
- Click the desired policy to open its Detail drawer
- Select the Settings tab, then Antivirus
- Expand the Mail Shield section (under Antivirus Protection)
The available configuration options are grouped as follows:
- Main settings
- Behavior
- SSL scanning
- Actions
- Packers
- Sensitivity
- Report file
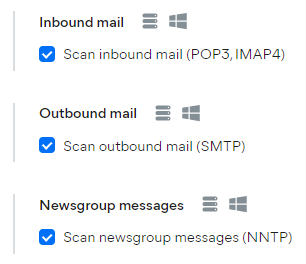
Main Settings
The main Mail Shield settings offer the following options:
- Inbound mail: Scans all incoming emails (POP3, IMAP4) sent using an SSL/TLS encrypted connection
- Outbound mail: Scans all outbound emails (SMTP) sent using an SSL/TLS encrypted connection
- Newsgroup messages: Scans all newsgroup messages (NNTP) sent using an SSL/TLS encrypted connection
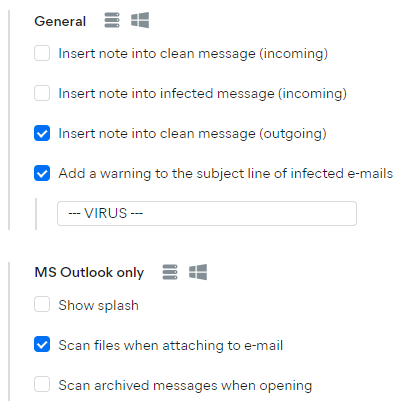
Behavior
Under the General section of the Behavior tab, you can decide whether you want to:
- Insert note into clean message (incoming)
- Insert note into infected message (incoming)
- Insert note into clean message (outgoing)
- Add a warning to the subject line of infected emails
For MS Outlook only, you can also choose to:
- Show splash screen
- Scan files when attaching to email
- Scan archived messages when opening (or just the unread ones)
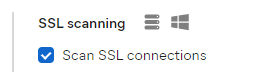
SSL Scanning
Here, you can choose whether Mail Shield scans SSL connections.
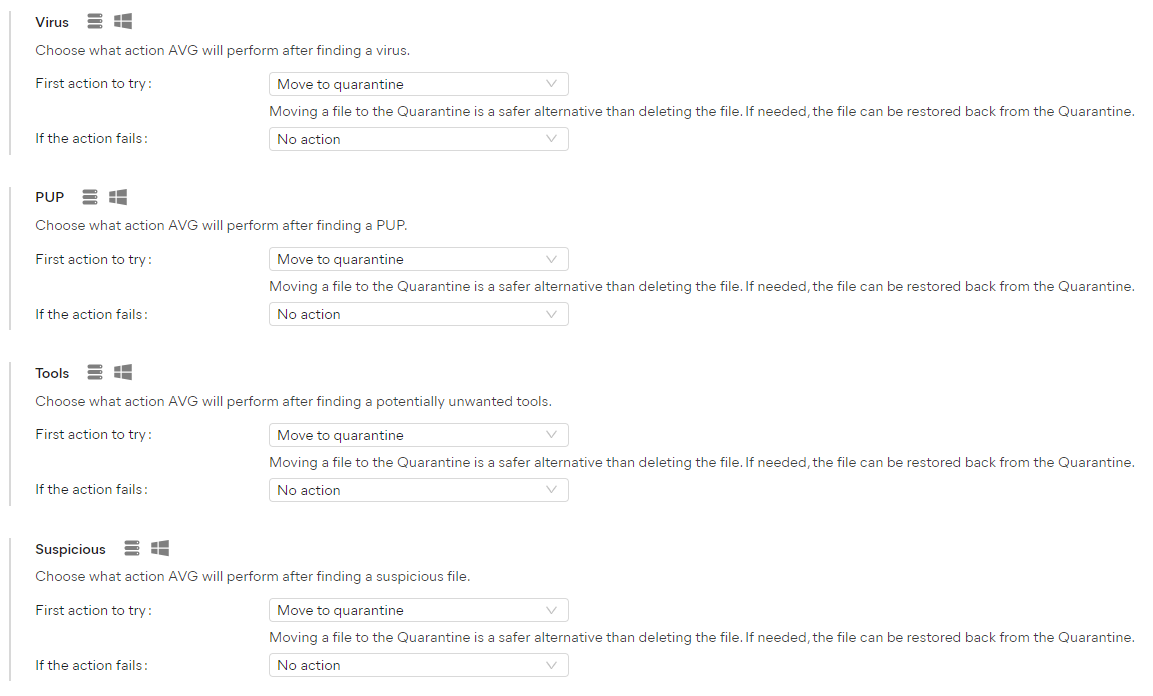
Actions
The Actions settings define how viruses, PUPs, unwanted tools, and suspicious objects are handled when detected by File Shield. For each type, it is possible to configure three actions to perform, with the "if the action fails" value. The following actions can be selected from each drop-down menu:
- Fix automatically: Runs a sequence of actions (repair file; if not possible, then move to Quarantine; if not possible, then delete)
- Move to
- Repair: Removes only malicious code attached to an otherwise safe file — this is not possible for files that are entirely malware
- Ask: AVG asks what you want to do with a detected threat before any action is taken
- Delete: Permanently remove the file from your computer
- No action: No action is taken during the scan; the threat is listed in your scan results and you can decide what to do later
For example, you can set the first action to Move to quarantine. If that fails, then Ask the user. If that then fails as well, the final action can be to Delete the file. If the final action also fails, nothing further will be performed (file will continue to be blocked).
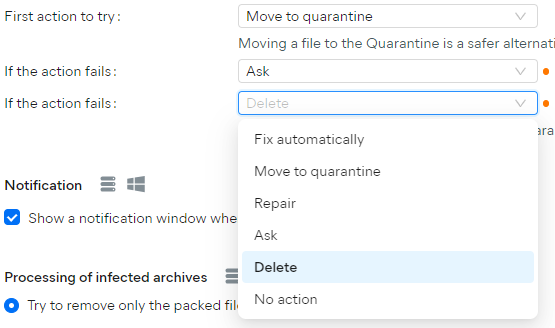
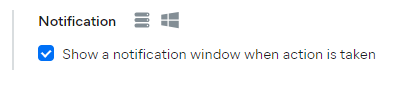
Under the Notification section, you can also define whether a notification will be displayed each time Mail Shield detects a threat on the device.
Lastly, the Processing of infected archives option allows you to configure what to do with detected archives. By default, the shield will try to remove the infected file from the archive and if that fails, nothing will happen.
The other option (removing the whole archive if removing the infected file from the archive fails) can lead to issues if there is a false positive, and the archive may be deleted if too large.

Packers
These settings allow you to define which archive (packer) formats AVG should try to extract during Mail Shield scans (unpacked files can be better analyzed for malware). Original archives remain intact while processed by Mail Shield. You can choose to use either all packer formats or just the ones you select from the list. By default, all packers are used.

Sensitivity
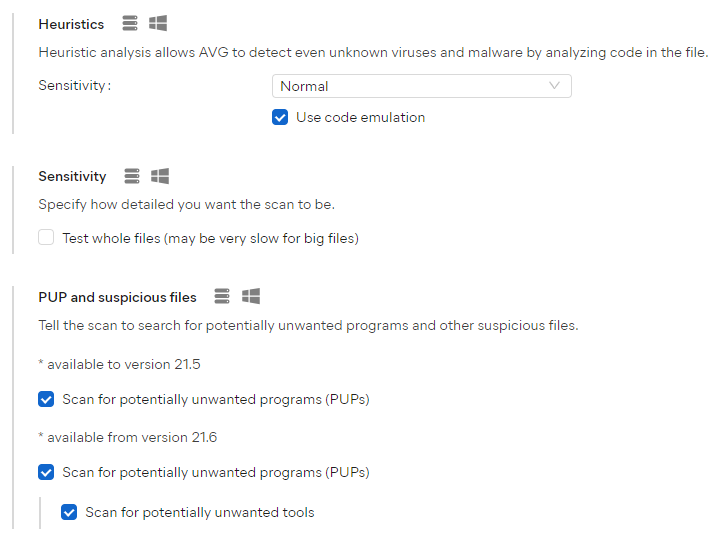
Here, you can adjust the sensitivity of the shield's scan:
- Heuristics Sensitivity: Heuristics enable the Antivirus to detect unknown malware by analyzing code for commands that may indicate malicious intent. The default setting is Normal. With higher sensitivity, Antivirus is more likely to detect malware, but also more likely to make false-positive detections that incorrectly identify files as malware.
- Use code emulation: Choose whether to use code emulations to unpack and test suspected malware in an emulated environment, where the files cannot cause damage to devices.
- Sensitivity: Enable Test whole files to check the whole content of a file instead of the parts typically affected by malicious code. There is usually no need to enable this option, and it will likely impact system performance.
- PUP and suspicious files: Choose whether or not to scan for potentially unwanted programs (PUPs).
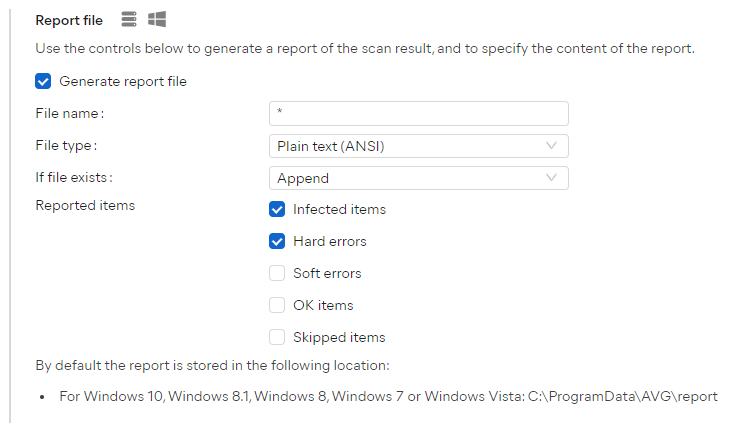
Report File
You can configure the report file here in order to enhance the reporting of the shield:
-
- The Generate report file checkbox needs to be ticked for the report file to be created.
-
- Plain text (ANSI)
- Plain text (Unicode)
- XML
- If file exists: Select Append if you want new results to be added to the end of the previous report, or Overwrite if you want new results to replace the previous report
- Using the Append option will gradually increase the size of the report file on the disk. Including informative events such as OK will also greatly increase the size on the disk as every clean file will be reported.
- Reported items: Define which events appear in report files:
- Infected
- Hard Errors — Unexpected errors that require further investigation
- Soft Errors — Minor errors, such as a file being unable to be scanned because it was in use
- OK
- Skipped
- Infected
At the bottom of the settings, the default location of the report is displayed.
FAQ
 Why can't I disable Mail Shield individually in a managed Antivirus client?
The managed endpoints are designed to be controlled from the policies, therefore the important shields are inaccessible from the UI to be disabled individually. Core Shields can only be disabled together.
Why are the Core Shields actions values blank, usually in managed devices?
The local Antivirus is simplified with its controls in the UI. The user can only control all shield settings from these toggles at once, rather than individual settings for each shield.
We have the advanced controls in our managed policies to be able to configure each shield individually, which overwrites the local client settings, leading to these options being empty.
They are still configured correctly, they simply are not visible in the local client UI.
How do I stop the user from disabling Mail Shield?
Enable the password protection of the UI (locally in unmanaged, from the policies in managed) in order to prevent the local user disabling shields.
I get a pop-up in my mail client that says I have an invalid certificate that is signed by AVG. Why is this happening?
Usually this indicates the underlying certificate of the mail server has the issue, rather than our certificate having a problem. Disabling the Mail Shield temporarily and reopening the mail client again will show the original certificate, which can be verified.