PROXIMANOVA-LIGHT.OTF PROXIMANOVA-LIGHTIT.OTF PROXIMANOVA-EXTRABLD.OTF PROXIMANOVA-BOLD.OTFPROXIMANOVA-BLACK.OTF
Get this font in here!
This Article Applies to:
- AVG AntiVirus Business Edition
- AVG Internet Security Business Edition
- AVG File Server Business Edition
- AVG Email Server Business Edition
When you erase a hard drive or delete a file using standard tools, only a reference to its data is removed from the file system. Simply deleting sensitive files, such as user data or licensed software, may not be safe, as there are tools capable of restoring deleted files. Data Shredder is an Antivirus component that allows you to irreversibly erase your files, folders, or entire drives by overwriting them with meaningless data multiple times before deleting them, which prevents their restoration or misuse. It is especially useful when selling or donating your PC or hard drive.
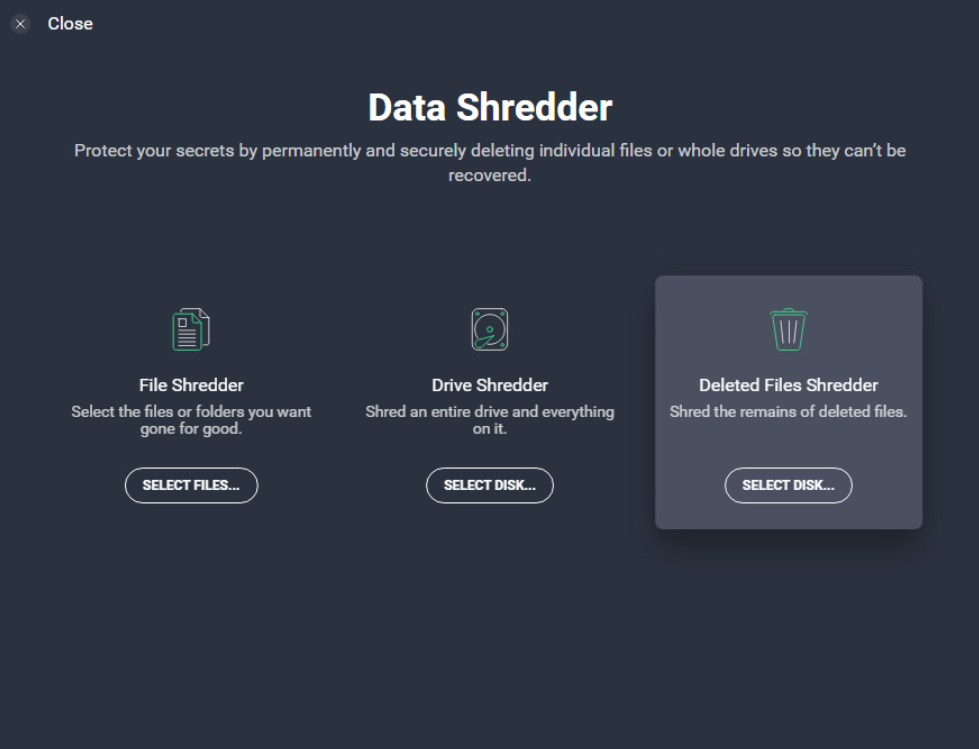
To access Data Shredder, go to
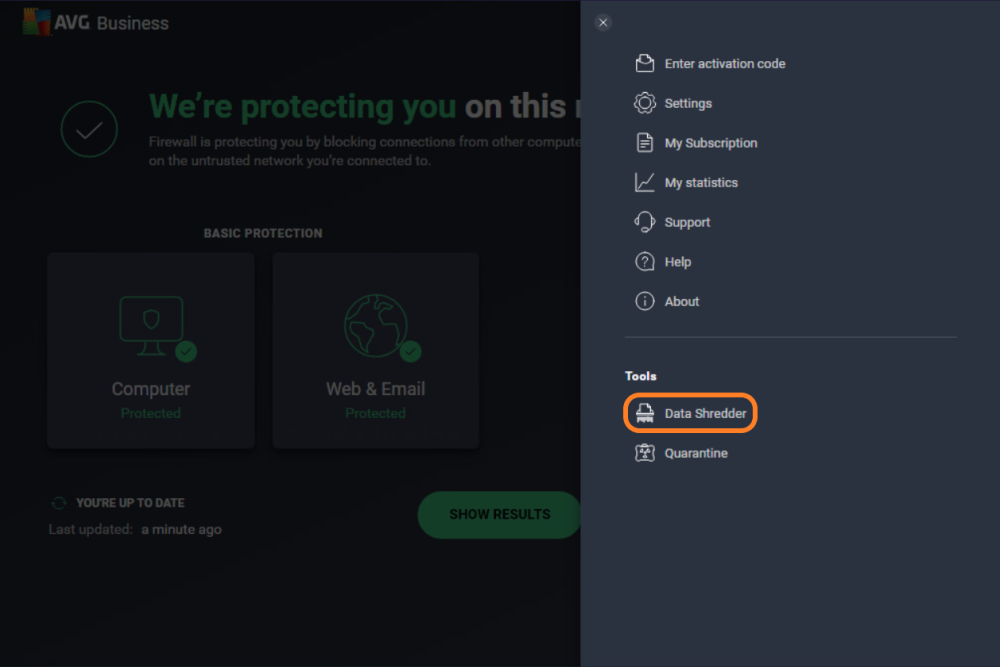
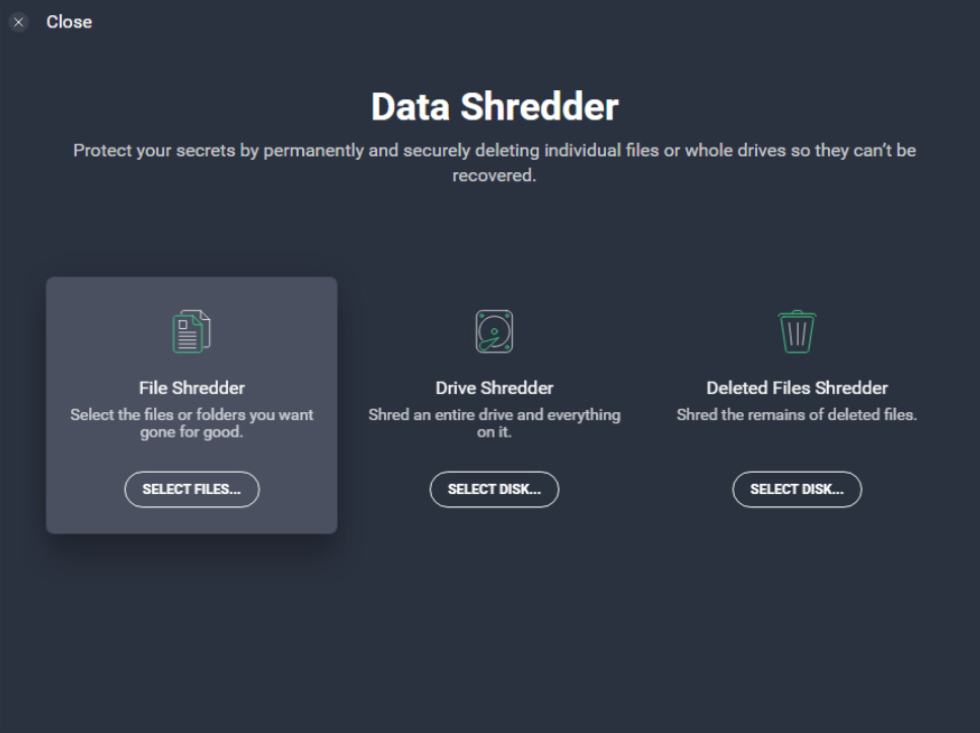
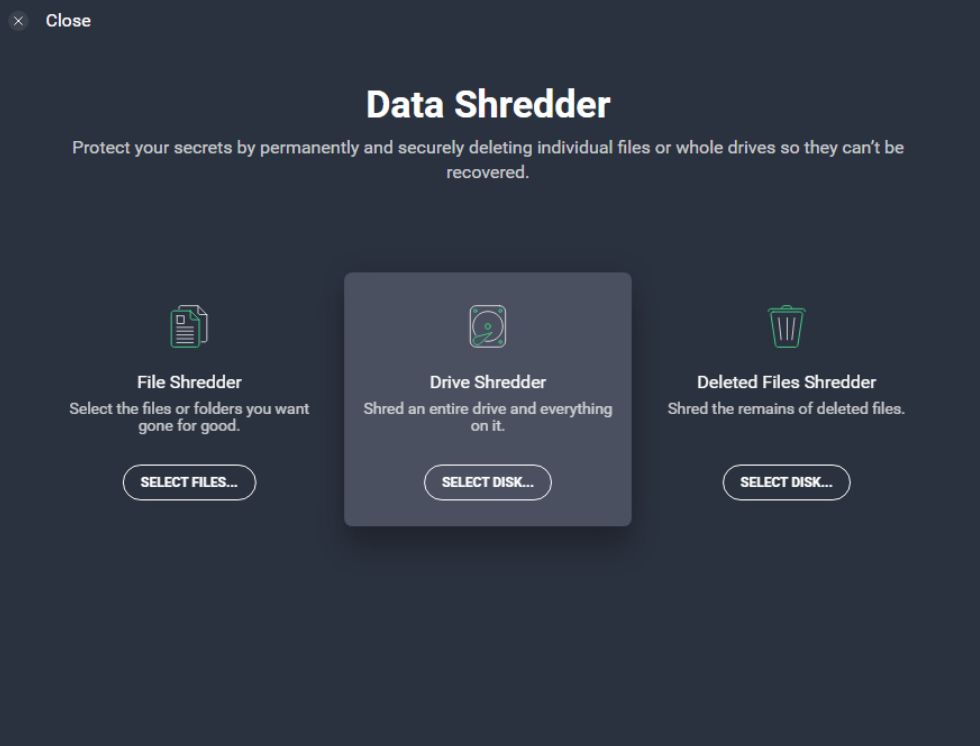
Here, you can select individual files/folders, complete drives, and/or already deleted files to shred.

Shredding Files or Folders
To shred one or multiple files/folders:
- From the Data Shredder screen, click Select Files... under File Shredder
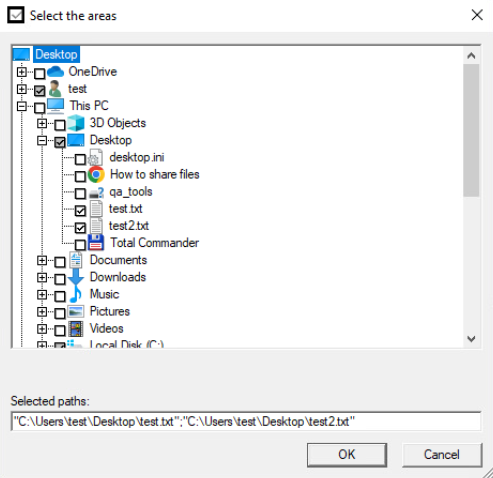
- From the folder dialog that opens, select the file(s)/folder(s) you wish to shred by ticking the checkboxes next to them, then click OK
- Review your selection (modify if needed by removing or adding files/folders), then click Shred

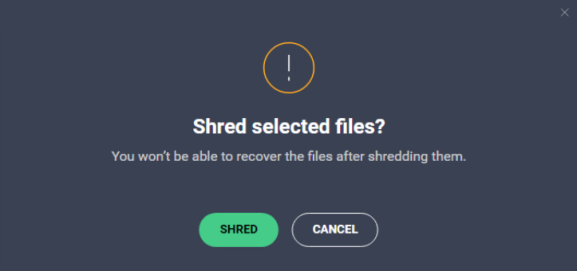
- Confirm your choice to start shredding
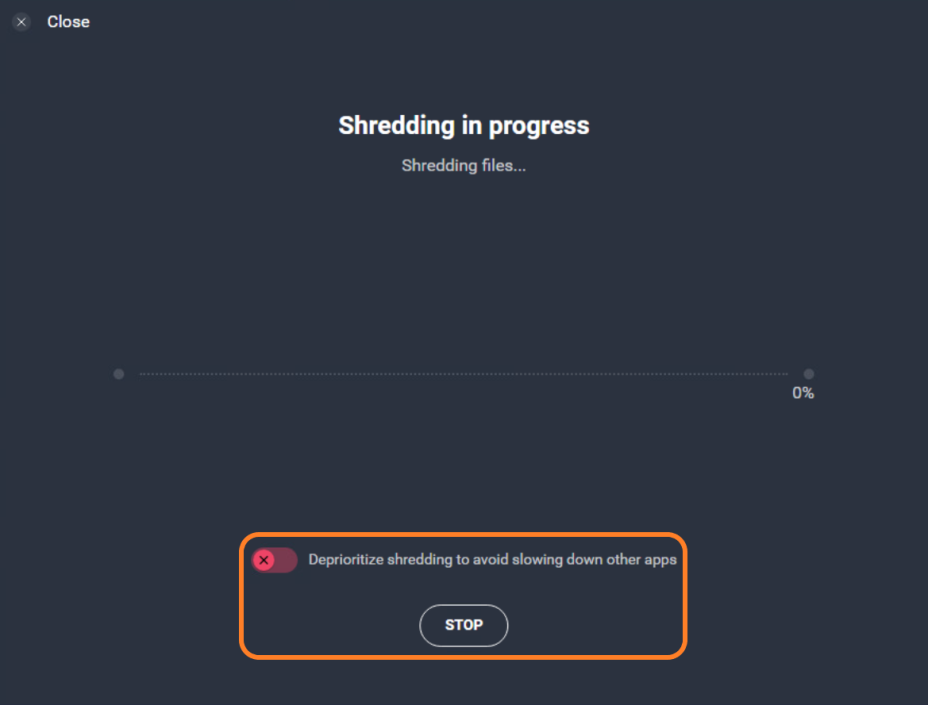
- Optional: You can manually stop or (de)prioritize shredding at any point during the process via the options at the bottom of the screen
By default, the shredding process is prioritized. You can change this via the advanced Data Shredder settings (see Configuring Data Shredder Settings).
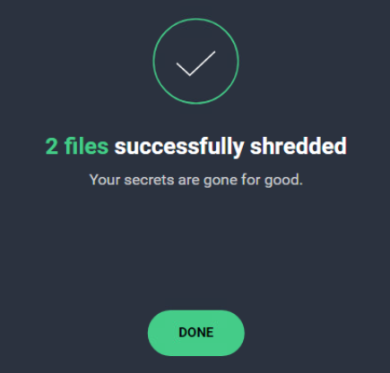
- Click Done once the process is complete
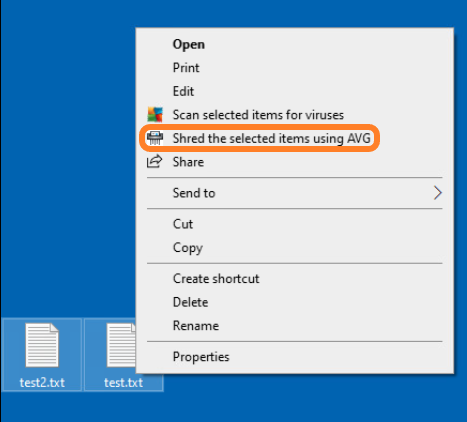
Alternatively, you can send files/folders to the shredder directly from your desktop or File Explorer via the Shred (the selected items) using AVG option in the Windows context menu (i.e. the menu that appears when right-clicking files/folders).
You can enable/disable this option via the advanced Data Shredder settings (see Configuring Data Shredder Settings).
Shredding Drives
You can shred a partition only when there are multiple partitions on the PC. Otherwise, you will not be able to perform this action.
Connected external drives can also be shredded.
To shred an entire drive:
- From the Data Shredder screen, click Select Disk... under Drive Shredder
- Select the drive to shred
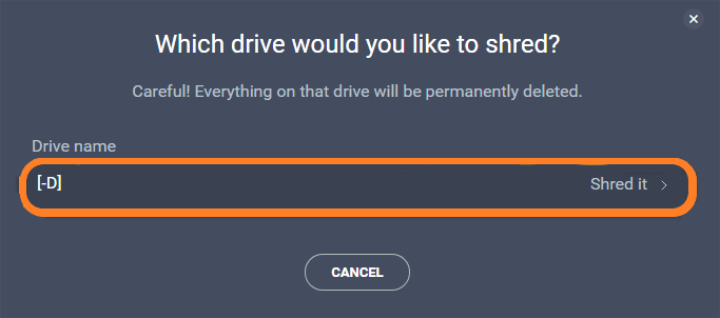
- Confirm your choice to start shredding
- As with shredding files/folders, you can stop or deprioritize the shredding while it is in progress.
- Click Done once the process is complete
Shredding Deleted Files
This option is useful if you have already used a standard deletion method, such as manually deleting the files.
To shred already deleted files and any leftover file fragments:
- From the Data Shredder screen, click Select Disk... under Deleted Files Shredder
- Select the drive from which to completely erase deleted files and file fragments
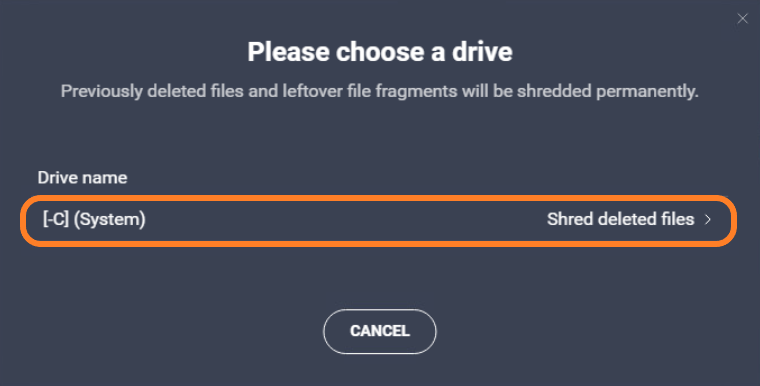
- Confirm your choice to start shredding
- As with shredding files/folders, you can stop or deprioritize the shredding while it is in progress
- Click Done once the process is complete
Configuring Data Shredder Settings
Advanced Data Shredder settings can be accessed by either clicking the gear icon on the Data Shredder screen or navigating to Menu > Settings >
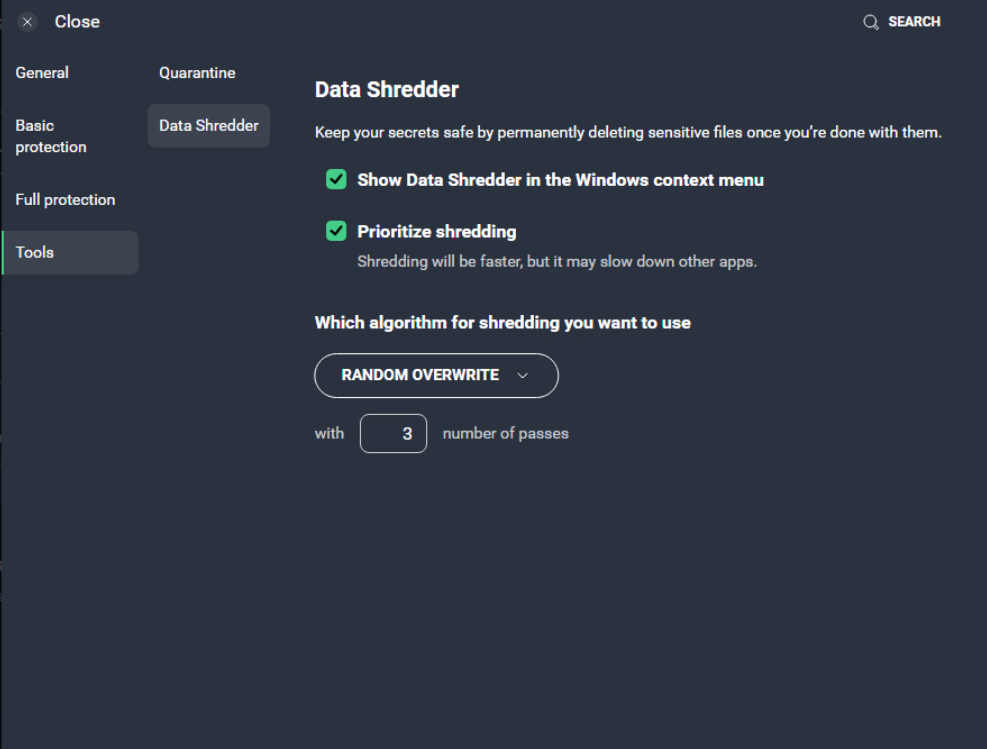
- Show Data Shredder in the Windows context menu: Enables the Shred (the selected items) using AVG option in the Windows context menu when right-clicking files/folders (see Shredding Files or Folders).
- Prioritize shredding: Allows for faster shredding (but may cause other apps to slow down).
- Choose which algorithm for shredding you want to use:
- Random overwrite (default option) overwrites data with random patterns. You can choose how many overwrites are performed (1 is default, 100 is maximum). This is the simplest and quickest method.
- DOD (Department of Defense) 5220.22-M algorithm overwrites data with zeros, ones, and random characters within three passes. This method is more secure, but slightly slower than the random overwrite method.
- Gutmann algorithm overwrites data according to the encoding mechanism used by the drive. This is the slowest, but the most secure method.
Additional Geek Area Settings
Within the Geek Area, there are several further settings for Data Shredder. To access these:
- Go to Menu, then select Settings
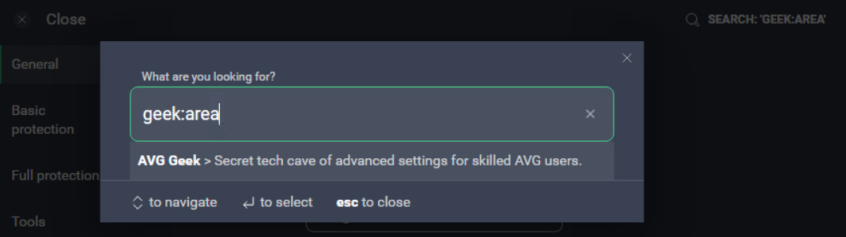
- Click Search in the top right corner
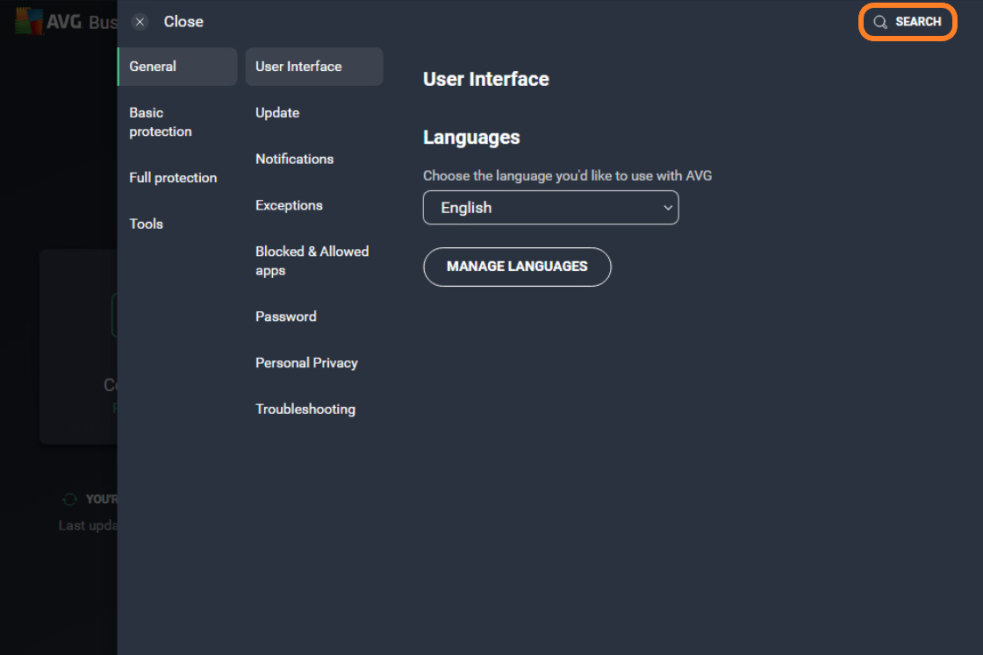
- Type geek:area in the search field, then hit Enter
- Scroll down to the Data Shredder section
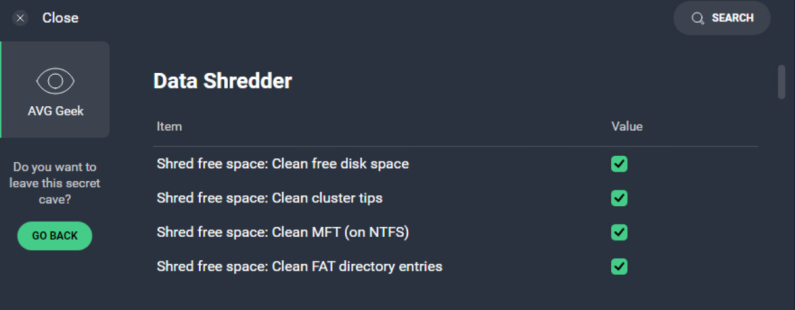
Here, you can enable/disable the following options by ticking/unticking the checkboxes next to them:
- Shred free space: Clean free disk space: Erases free disk space that remains after deleting the files in a regular way.
- Shred free space: Clean cluster tips: Erases "gaps" in space that has been overwritten but can still contain data.
- Shred free space: Clean MFT (on NTFS): Erases Master File Tables (MFT) entries that contain file reference information (file size, date stamps, permissions, etc.) from the data structure for NTFS disks.
- Shred free space: Clean FAT directory entries: Erases file reference information from the data structure for FAT disks.
FAQ
 How can I quickly shred a file?
Right-click the file and select Shred using AVG from the Windows context menu (if the option is enabled in advanced settings).
How can I make sure my data is really well deleted?
Use the Gutmann algorithm, which is the slowest but most secure method of deletion.
Why is my device running slow while shredding files?
Data Shredder has some options to prioritize shredding to speed up the process - this can be disabled in advanced settings to help reduce system issues. During the shredding process, there is also a toggle that can be used to deprioritize the shredding.
Why isn't Data Shredder shredding my files?
Data Shredder may not be able to shred certain files due to insufficient access rights. In such cases, we recommend deleting a file manually, and then using the Deleted Files Shredder on the main Data Shredder screen.