PROXIMANOVA-LIGHT.OTF PROXIMANOVA-LIGHTIT.OTF PROXIMANOVA-EXTRABLD.OTF PROXIMANOVA-BOLD.OTFPROXIMANOVA-BLACK.OTF
Get this font in here!
This Article Applies to:
- AVG Business Cloud Console
What is a Master Agent?
A Master Agent is a role assigned to device(s) within the network in order to scan for available devices and perform remote deployment or central update distribution.
In the Cloud Console, there are two roles available:
- Update Agent: Responsible for distributing the installation package centrally when deploying manually on a device, or via remote deployment. The Update Agent is also responsible for centrally distributing program, virus definition, and Business Agent updates across the network.
- Scanning Agent: Responsible for detecting devices within the network to allow remote installation.
Only Windows devices can be set as Master Agents.
Devices and the console communicate directly for licensing, usage data, and threat notifications.
Master Agent Requirements
- Windows 7+ or Windows Server 2008 R2+
- 10GB disk space (Update Agent)
- Static IP address assigned
- Device always accessible/high availability
Managing Master Agents
The Master Agents are configurable from the Devices page in different areas.
Update Agent
To set a device as an Update Agent:
- Go to the Devices page
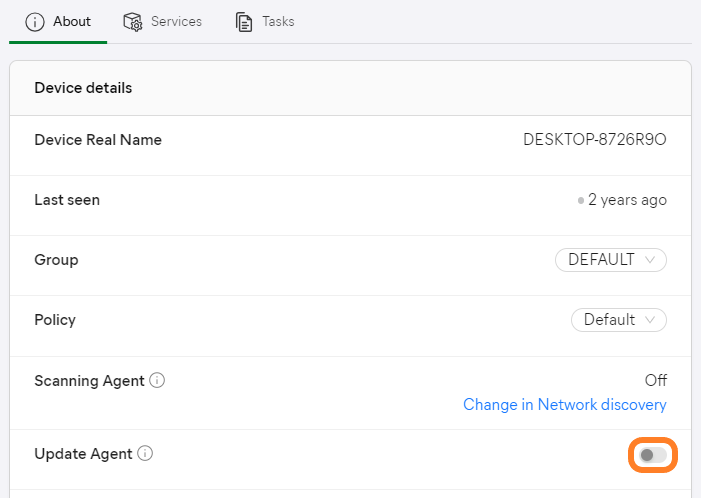
- Click the desired device to open its detail drawer
- Under the About tab, click the toggle next to Update Agent to enable the role
- In the displayed dialog, click Promote
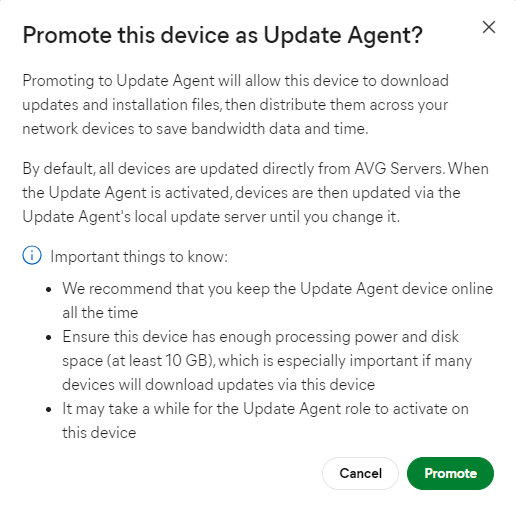
The Processing... status will be displayed until the feature is fully enabled.

Devices promoted to Update Agents will have the update icon added to their Device alias column.
The Cloud Console supports multiple Update Agents in the same network (unlike the On-Premise Console and CloudCare, where only one Update Agent can be enabled at a time in a network).
Verifying the Used Update Agent
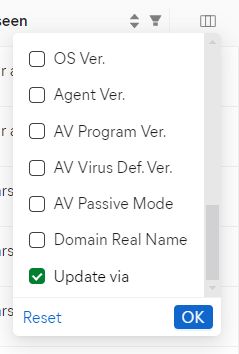
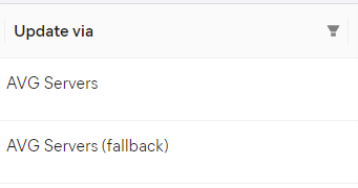
The information on which Update Agent will be used by devices can be displayed on the Devices page by adding the Update via column.
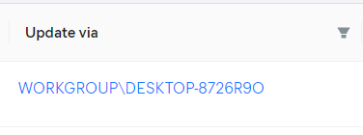
For each device updating from the Update Agent, the column will display the agent's alias, which can be selected to open the device detail.
In cases where Update Agent is normally used, but the device is outside the network or Update Agent is inaccessible at the time, the column will display AVG Servers (fallback). If the device is in a different network/not using Update Agent, the column will display AVG Servers instead.
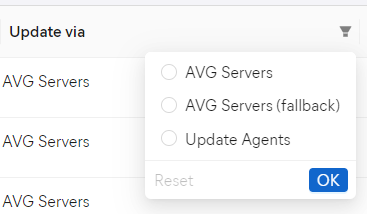
To facilitate data lookup, you can filter the column by these statuses.
Within the device detail of a device using the Update Agent, it is possible to set it to always update directly from AVG servers.
Clicking the x Update Agent(s) available link will redirect you to the Devices page, filtered to show only devices with the Update Agent role.

The same can be done via the device's actions menu (three dots).
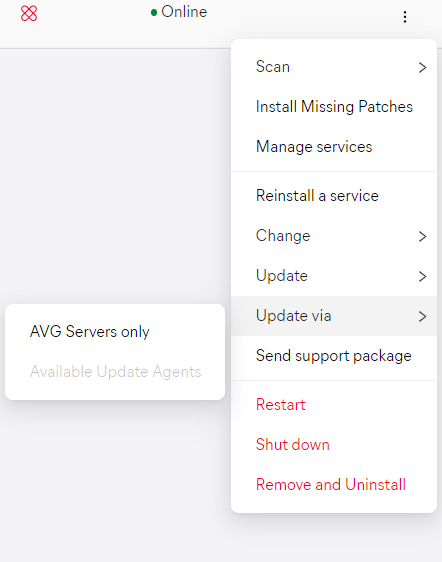
The action can be reverted by setting the toggle to OFF (gray) or selecting Available Update Agents from the actions menu.
Scanning Agent
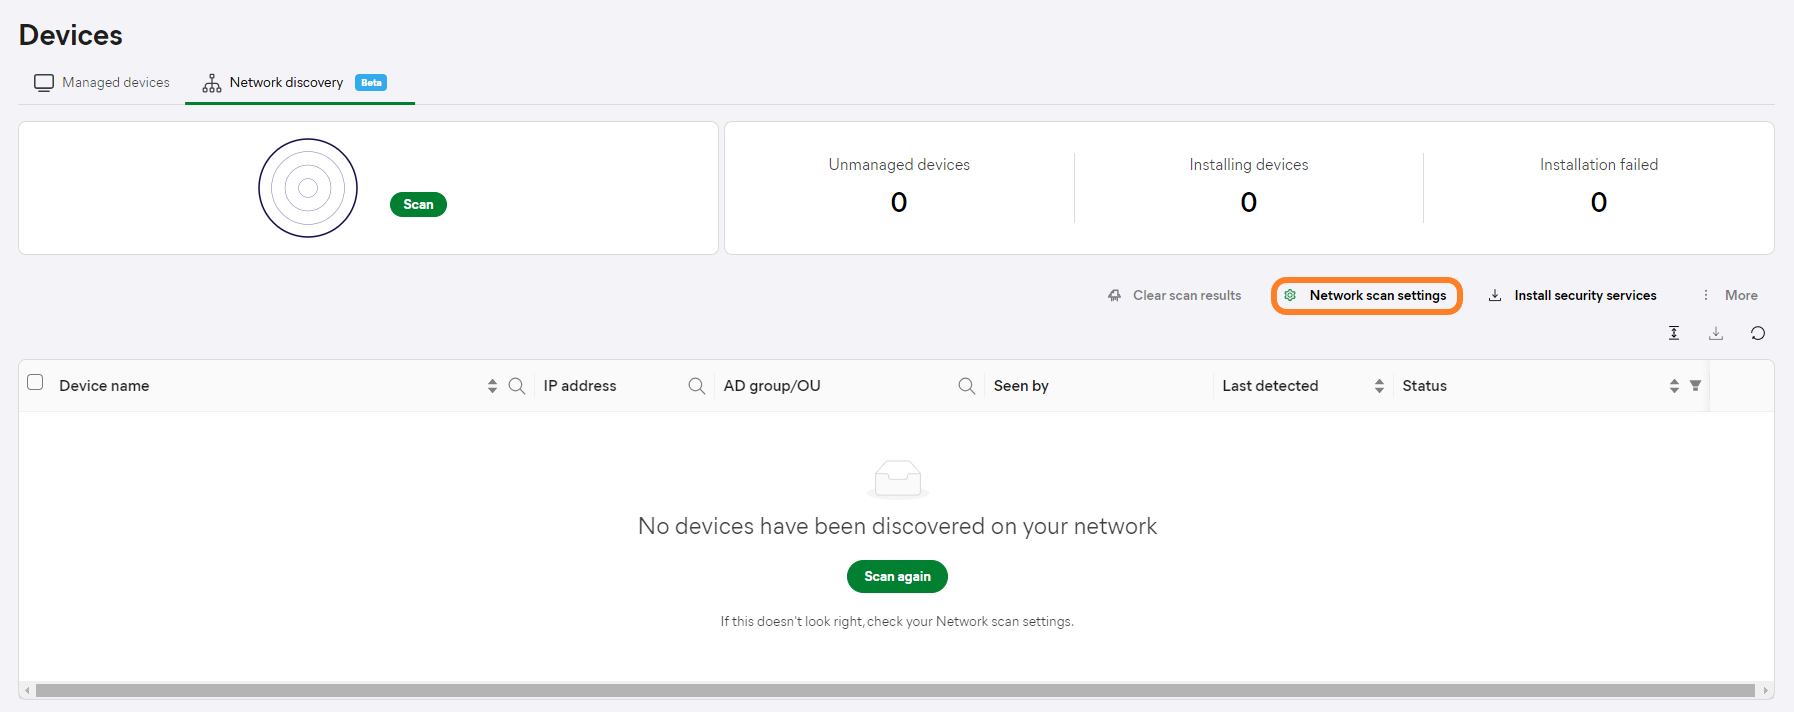
Within the device detail, the Scanning Agent status is displayed. Unlike Update Agent, however, Scanning Agent cannot be enabled directly here, but it provides the link to the Network scan settings.
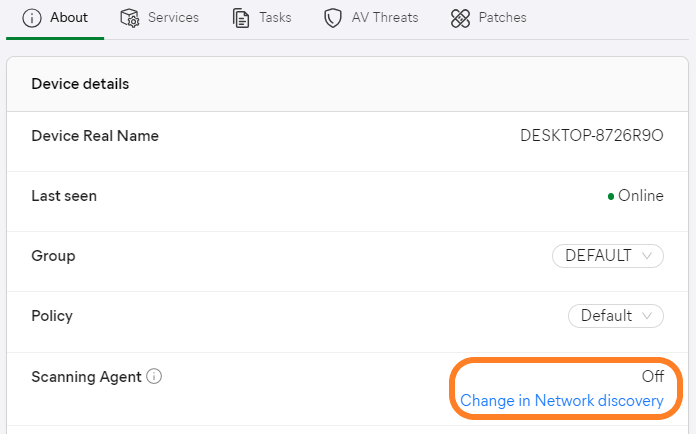
These settings can also be accessed directly in the Network discovery tab of the Devices page.
The initial setup of Network Discovery is explained in
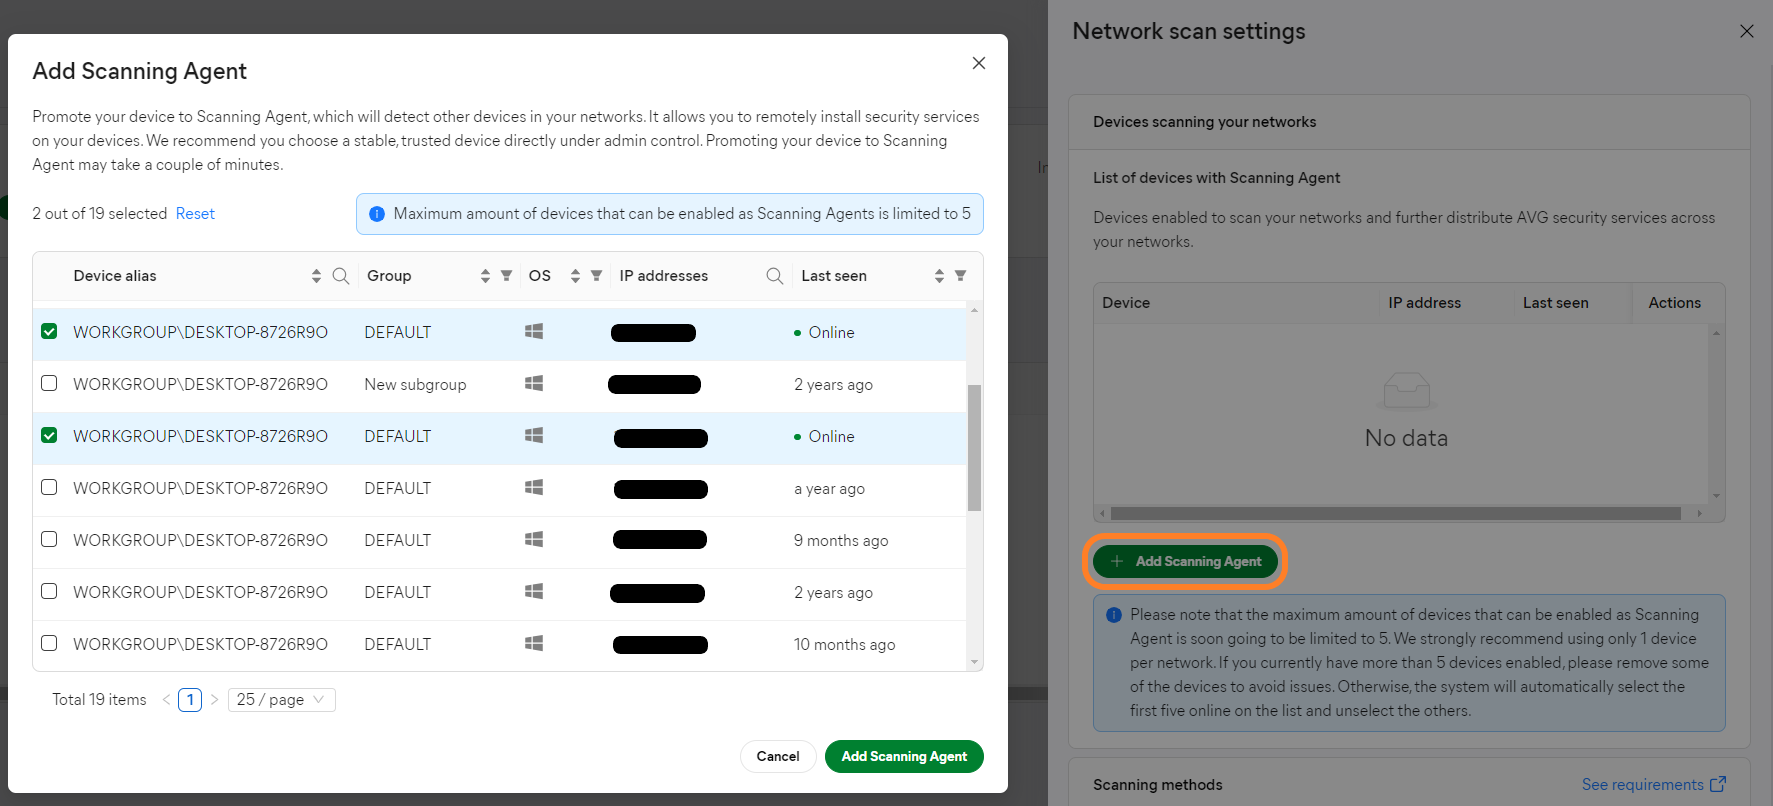
Selecting + Add Scanning Agent in the Devices scanning your networks section of the settings will open the selection dialog. You can then select individual or multiple devices.
The total number of Scanning Agents will soon be limited to five. Therefore, we strongly recommend against using more than one Scanning Agent per network. If you currently have more than five Scanning Agents enabled, please disable some of them to avoid issues. Otherwise, only the first five online devices on the list will remain agents, while the rest will have this role automatically removed.
The added agent(s) will be listed in the settings drawer and can be deleted if needed.
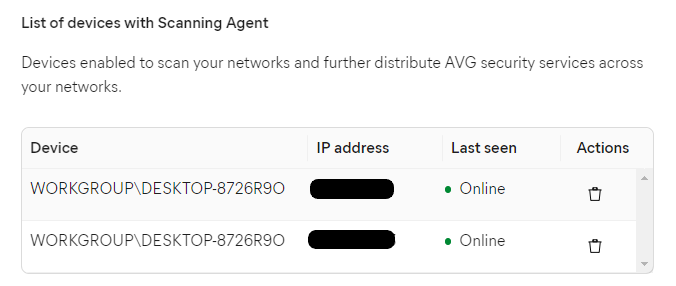
Saving the changes will apply the Scanning Agent role to the device(s). Back in the Managed Devices tab of the Devices page, the device(s) will now show the Scanning Agent icon.
Also, the Scanning Agent status in device detail will now be On.

Recommendations for Scanning Agents
Scanning Agents have access to your entire network and can remotely access devices. For security reasons, we recommend following these guidelines:
- Use only one Scanning Agent per network
- Ensure your Scanning Agent is a trusted, non-roaming device with secure access (such as a server)
- Use a device your network administrator has full control over
- If necessary, add exceptions in your network for the scanning agent to avoid triggering network security measures
Troubleshooting
If you are having trouble enabling your
If Update Agent is enabled, the agent.log in C:\ProgramData\AVG\Business Agent\log displays the following line:
[2024-02-01 12:37:10.956] [info ] [Agent ] [ 4468: 6200] [2693FD: 115] agentcore.cpp(2843) asw::agent::CAgentCore::StartUpdateProxyServer:Device is a master agent
The updateproxy.log will display information if the
-
[2024-02-01 12:28:13.235] [info ] [UpdateProxy] [ 4468: 6200] [2693FD: 115] ProxyServer2.cpp(87) CProxyServer2::StopListening: UpdateProxy StopListening end -
[2024-02-01 12:28:14.563] [info ] [UpdateProxy] [ 4468: 6200] [2693FD: 115] FirewallAuthorizedApps.cpp(368) CFirewallAuthorizedApps::RemovePort: RemovePort: 4158 removed! -
[2024-02-01 12:28:24.115] [info ] [UpdateProxy] [ 4468: 6200] [2693FD: 115] ProxyServer2.cpp(177) CProxyServer2::OnPolicyChanged:Current system is not master; not listening
If the
-
[2024-02-01 12:37:11.595] [info ] [UpdateProxy] [ 4468: 6200] [2693FD: 115] FirewallAuthorizedApps.cpp(324) CFirewallAuthorizedApps::AddPort: Port 4158 is now open in the firewall -
[2024-02-01 12:37:11.595] [info ] [UpdateProxy] [ 4468: 6200] [2693FD: 115] ProxyServer2.cpp(122) CProxyServer2::AddFirewallPorts: UpdateProxy: Added UpdateProxyPort to Windows Firewall -
[2024-02-01 12:37:11.595] [info ] [UpdateProxy] [ 4468: 6200] [2693FD: 115] ProxyServer2.cpp(36) CProxyServer2::StartListening: UpdateProxyStartListening -
[2024-02-01 12:37:11.595] [info ] [UpdateProxy] [ 4468: 6200] [2693FD: 115] FileManager.cpp(634) CFileManager::PerformHousekeeping: FileManager: Performing housekeep
The device will show the command received in the sbr_manager.log when the
[2024-02-01 12:37:14.127] [info ] [SBR.MANAGER] [ 4468: 6200] [2693FD: 115] Runtime manager::ProcessCommand: sbID: sb_av, command: "{"cmdId": "set_mirror", "payload": "{\"addr\": \"10.5.102.138\", \"port\": 4158}" }"
If this command is not received, the
The following will unset the mirror/it will be disabled:
[2024-02-01 12:57:38.467] [info ] [SBR.MANAGER] [ 4468: 6200] [2693FD: 115] Runtime manager::ProcessCommand: sbID: sb_av, command: "{"cmdId": "set_mirror", "payload": "{\"addr\": \"\", \"port\": 0}" }"
The log folder is protected by self-defense if Antivirus is installed. You will need to temporarily disable self-defense to be able to access the folder. You will also need to copy the files out of the folder to open them, as they are in use.
If you have verified these settings are all correct but you continue to experience issues with your Update Agent, please contact AVG Business Support for further assistance.
FAQ
 Can I enable multiple Update Agents?
Yes, Cloud Console supports multiple Update Agents in the same network (unlike the On-Premise Console, where only one Update Agent can be enabled at a time in a network.
Can I enable multiple Scanning Agents?
Yes. However, we recommend only one per network in order to not put too much load on devices constantly updating data from alternate scans.
Can I set a device as the Scanning and Update Agent?
Yes, but it is not mandatory, different devices can be Scanning and Update Agents. For ease of administration, usually they are the same device.
Can I use Scanning Agent without an Update Agent?
Yes. Deployment will be performed from the Scanning Agent.
Does the Scanning Agent need to have the Antivirus service running to deploy remotely?
No. The Antivirus agent can be deployed without any services, and will be able to remotely deploy any service.
How do I know the scanning has started on the Scanning Agent?
The agent_log.log file will show the scan command received.
 What are the Scanning Agent requirements?
The Scanning Agent must be Windows 7 or higher. The 2015-2019 redistributable and the HNS component (technology used for scanning) are installed when you enable the Scanning Agent. The sb_deploy.log file shows these results, and the vs_
redist.x86.log file shows the redistributable installation results.
Related Articles: